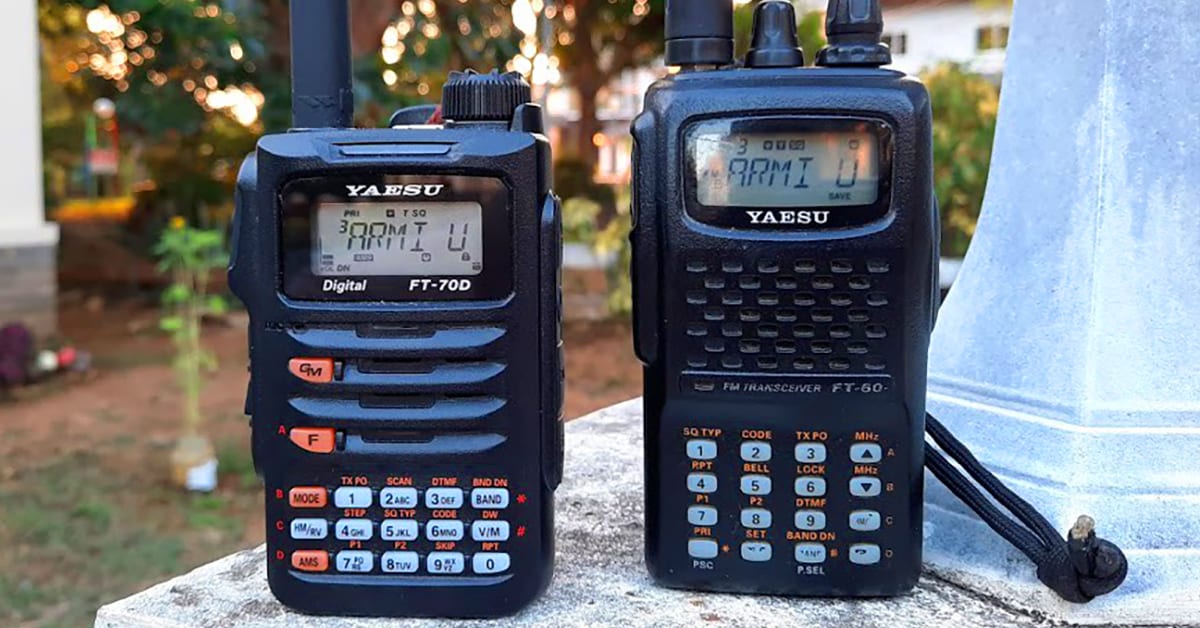
This document is created to help owners of the Yaesu FT-60R program their radio for use with repeaters.
NOTE: The Dial knob is used frequently in the steps below. This knob is the one on the top of the radio, on the far right when viewing the radio from the front.
- Go to www.repeaterbook.com (I also recommend buying a hard-copy repeater book at
- Amazon (https://www.amazon.com/ARRL-Repeater-Directory-2016-
- Pocket/dp/1625950535/ref=sr_1_1?s=books&ie=UTF8&qid=1483567244&sr=1-1&keywords=arrl+repeater+directory+2016-2017) so that you still have a list even if the Internet goes down or you are in a place where you cannot access the Internet)
- Click on “North American Repeaters” under the Main Menu on the left-hand side of the page.
- Click on the appropriate state (either your home state, or the state that you are currently in, whichever is appropriate)
- Under “Repeaters by nearest city/town:”, look for the closest city to your current location and click on it.
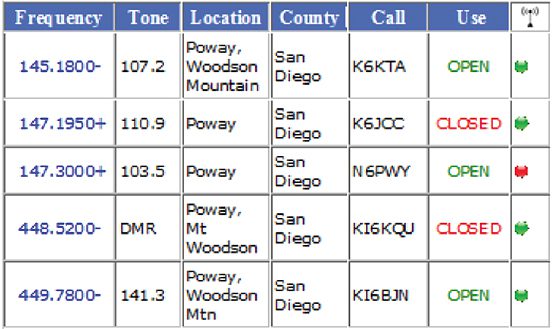
- In most cases, you will see only one repeater, however, there may be multiple repeaters listed for your city. Look for a repeater that is listed as “Open” under the “Use” column, preferably one in the 144 Mhz range under Frequency (the 144 MHz range will travel further with less power in this range than in the 440 MHz range).

- In the above repeaterbook example, we will use the first frequency.
- Note the frequency (145.1800 Mhz)(NOTE: The trailing 0 will NOT be entered into the radio).
- Note the sign following the frequency (+ or -), as this represents the offset that will need to be set if Automatic Repeater Shift (ARS) is not used (in this case, “-“).
- Note the Tone (in this case, 107.2).
Turn on the radio by turning the Power knob (knob between the antenna and the Dial knob on the top of the radio) clockwise.
To start, make sure you are in the Variable Frequency Oscillator (VFO) mode (VFO is the mode that allows you to manually input a frequency, either by direct input from the keypad or through turning the Dial knob). Push the [V/M] button on the radio until you see a frequency on the LCD screen. If you see a small, blinking number on the upper left (such as 001, 002, etc), then you are in the memory mode and need to press the [V/M] button again.
Manually enter the frequency (145.180) on the keypad (note that you will NOT be required to enter the “.”, so you would enter [1][4][5][1][8][0]. The frequency is set once the last key is pushed.
Next, ensure the Automatic Repeter Shift (ARS) is turned on.
- Press the [F/W] key on the keypad, then press the [0] key (has the word “SET” above it).
- Rotate the Dial knob until you see ARS on the screen.
- Press the [F/W] key momentarily to adjust the ARS.
- If you see ARS.OFF on the screen, then turn the Dial knob until you see ARS.ON, otherwise proceed to the next step.
- Push the Push To Talk (PTT) (located on the left side of the radio when viewing the radio from the front. It is the big key at the top) switch to save this setting and return to normal operation.
Next, set the radio to use a tone (if a tone is noted under “Tone” for your selected frequency, otherwise skip this step).
- Push the [F/W] key, then press the [1] key (has “SQ TYP” above it).
- Turn the Dial knob until you see the word “TONE” on the screen (this configures the radio to send a tone to access the repeater. If you want to keep your radio quiet (muted) until you receive a signal with the appropriate tone, then turn the knob one more click, where you will see “TSQL” on the screen. NOTE: This is NOT recommended, as some repeaters do not retransmit the tone, in which case your radio would not broadcast any return signal. Setting “TONE” would cause your radio’s receive to activate for any signal returning on the offset frequency (preferable). Now push the PTT button to set this function.
Set the specific tone to be used (if a tone is noted under “Tone” for your selected frequency, otherwise skip this step).
Your radio is now programmed for the specific repeater you would like to use! Now, if you want to save this specific repeater in memory, use the following steps:
- Press and hold the [F/W] key for one second.
- The screen should display a small blinking number in the upper left portion of the screen (001, 002, 003, etc).
- Press the [F/W] key again within 10 seconds.
The repeater frequency, offset and tone are now all stored in memory. If you want to assign a name (limited to 6 characters) to this frequency (for example, “POWAY” in the above example), use the following steps:
- Press the [F/W] key, then press the [0] key (has the word “SET” above it).
- Rotate the Dial knob until you see “NM WRT” on the screen.
- Press the [F/W] key to see any previous label, then press the [F/W] key again to clear.
- Rotate the Dial knob until the first character (in our example, “P”) is displayed on the screen.
- Press the [F/W] key to save the character and move to the next character.
- Follow steps 4 and 5 for the remaining characters until all characters are set. NOTE: You can use the down arrow key (has “MHz” above it, and “B” to the right of it, and is the second key from the top on the far right side of your keypad) to back-space the cursor if you need to correct a character entry.
- If the label is less than 6 characters, you will need to press the [F/W] key for one second. If your label is exactly 6 characters in length, then the final momentary press of the [F/W] key in step 5 will be sufficient to save the label.
Now your radio is fully programmed with a repeater, and all the information is saved in a memory slot on the radio under the specific name you have given it (“POWAY” in our example above).
Generally, when you turn your radio on, it will return to the last state you had it in when you turned it off. This means that if you had it in memory mode (using the repeater information saved in memory) it will turn on in that state. If you have multiple repeaters programmed in to your radio, just turn the Dial knob until the repeater you want to communicate with is listed on the screen.
If, however, you are in the VFO mode, and you want to use a repeater frequency that is stored in memory, then push the [V/M] key once and you should be in memory mode now. Just rotate the Dial knob until the repeater frequency (or name, if you have labeled it) is displayed on the screen.


0 Comments